My twitter/bloggy friend Julie asked me about this block I made for the lovely Tacha for theAnother Quilting Bee 1 swap group, so I thought I'd do a quickie tutorial for her and the rest of you too. I was just winging it when I made this block for Tacha, so I had to measure the finished block to determine the sizes of each piece.
This block is my own design using Maverick Star and classic 9-patch components. Please don't use it in items to sell, and if you do make it, I'd love if you sent some blog traffic my way. New friends are always welcome!
If you have any questions, please feel free to leave a comment and I'll try my best to clarify.
Enjoy!
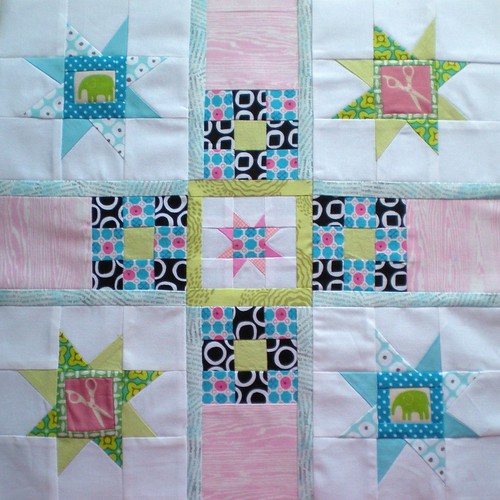
Sarah's Stars Block - This block finished ast 16.5 inches with seam allowance. It's a biggie.
To make this block you will need to know how to make a 9-patch block and a Maverick Star. That tutorial has already been done, so I'll send you here to get it. I will use the colours in the layout pictures when referring to each piece.
Here is a picture of the block layout.
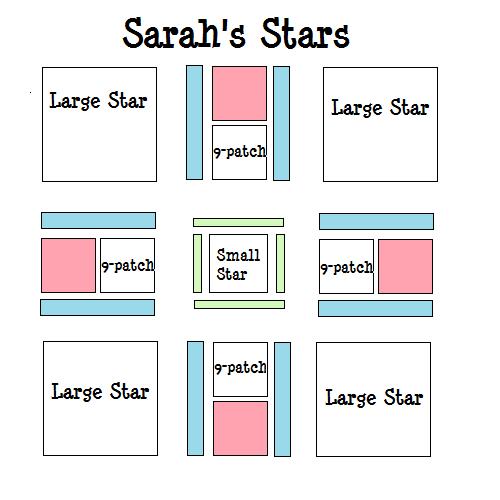
It consists of:
4 large Maverick Stars
1 small Maverick Star
4 small 9-patch blocks
Strips to connect them all together
Start by making these block components.
• 4 large stars using a 2.5 inch square for each of the 9 segments (you can do a fussy cut centre if you want, I added strips around to make my fussy cuts big enough for the block centres)
• 1 small star using a 1.5 inch square for each of the 9 segments
• 4 small 9-patch blocks using a 1.5 inch square for each of the 9 segments
Out of green fabric cut:
• 2 pieces 3.5" x 1"
• 2 pieces 4.5" x 1"
Out of light blue fabric cut:
• 8 pieces 6.5" x 1"
Note: the green and blue fabric strips are all 1 inch wide, my picture is not to scale)
Out of pink fabric cut:
• 4 squares 3.5" x 3.5"
Let's get started!
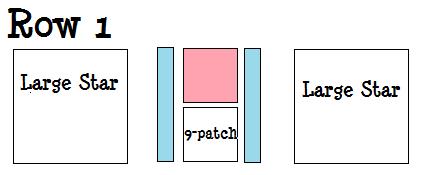
Row 1 Assembly
1. Sew pink square to the 9-patch block and attach the blue strips on each long side of this unit.
2. Attach one maverick star block to each side.
3. Make sure that the pink square is at the top of this row.
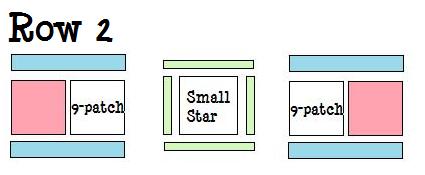
Row 2 Assembly
1. Sew the short green pieces on either side of the small star, then add the top and bottom pieces.
2. Sew pink square to the 9-patch block and attach the blue strips on each long side of this unit. Do this two times.
3. Attach the three sections together following the diagram. Make sure the pink squares are on either end of this row.
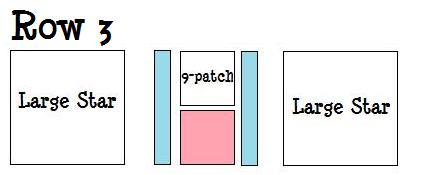
Row 3 Assembly
1. Sew pink square to the 9-patch block and attach the blue strips on each long side of this unit.
2. Attach one maverick star block to each side. Make sure that the pink square is at the bottom of this row.
Sew rows together.
Voilà! You're done!
If you make this block I'd love to see it! I know that you won't all be rushing into your sewing rooms to make this, but if you do, please post photos in the flickr group I just made.